Instructor Manual
Design Course/Section

Figure 6.1: Design Tab
Pre-Assessment

Figure 6.1: Test set : Pre Assessment Modal Box with Pencil Icon and Title, Description, and Items box
You will get the following tabs:
Schedule Test
Schedule Test tab allows you to set Start Date, End Date, Time Zone, Prerequisite, and Password of test.

Figure 6.2: Schedule Test Tab of Pre-Assessment Settings
Test Setup tab allows you to set test duration, tries allowed and perform the following actions:
- Randomize Items: It allows you to randomize items in the Pre-Assessment.
- Randomize options: It allows you to randomize options of the questions.
- Pausing allowed: It allows the student to pause the Pre-Assessment in between.
- Set last option as “None of the above”: It allows student to select “None of the Above” option in the Pre-Assessment.

Figure 6.3: Test Setup Tab of Pre-Assessment Settings
Levelling
Levelling tab allows you to manage the visibility of the Lessons and Post Assessments on the basis of readiness score.

Figure 6.4: Pre-Assessment Settings Modal Box with Levelling Tab
To do the required settings in Score (%), Lesson, or Post Assessment, click the Enable button at the bottom.
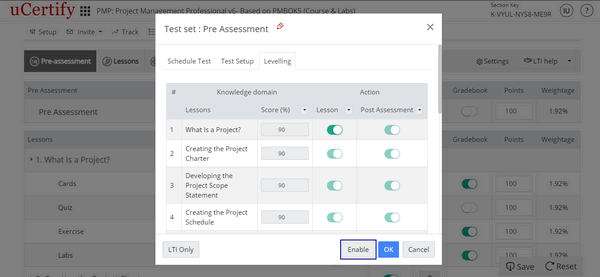
Figure 6.5: Pre-Assessment Levelling Modal Box with Enable Button
To set the readiness percentage for every lesson, click drop-down next to the >Score (%) option. Enter the desired readiness percentage and click the OK button.
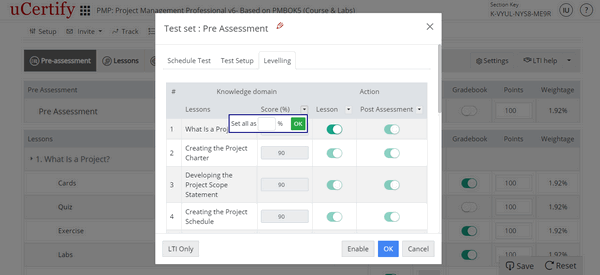
Figure 6.6: Pre-Assessment Levelling Modal Box with >Score(%) Drop-down
To turn Off or On the visibility of entire accessibility of every lesson or questions of a lesson in the Post Assessment, click the Lesson or Post Assessment drop-down, and select the desired option.
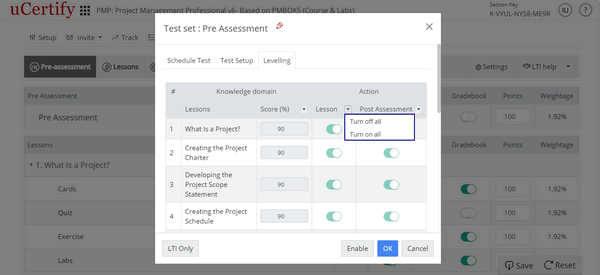
Figure 6.7: Pre-Assessment Levelling Modal Box with Lesson Drop-down
To turn Off or On the visibility of entire accessibility of every lesson or questions of a lesson in the Post Assessment, click the Lesson or Post Assessment drop-down and select the desired option.
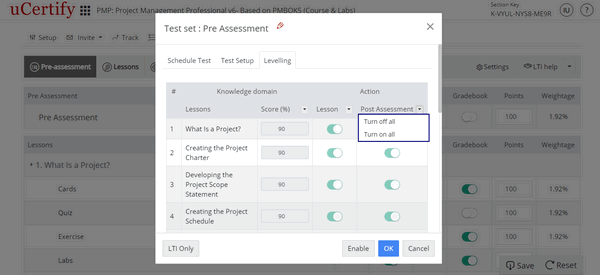
Figure 6.8: Pre-Assessment Levelling Modal Box with Post Assessment Drop-down
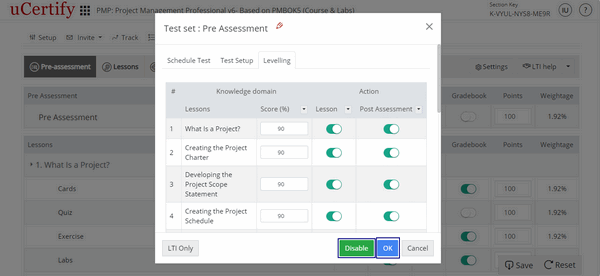
Figure 6.9: Pre-Assessment Levelling Modal Box with Disable and OK Button
- Items represents the number of items in the particular grade item.
- To hide desired grade items or chapters, under the Visibility option, click the On or Off button.
- To edit settings of the grade items or chapters, click the settings menu next to the desired grade item or chapter.
- The Points option represent the summative evaluation of a student’s performance across a grade item tracked in the Gradebook. Enter the Points parallel to the grade item.
- The Weightage option is based on the Points assigned in the Gradebook.
- To include or exclude grades of a particular item in the gradebook and sync, click the On or Off button, under the Report option, parallel to the grade item.
- To include or exclude grades of a particular item from the final grade calculation, click the On or Off button, under the Graded option, parallel to the grade item.
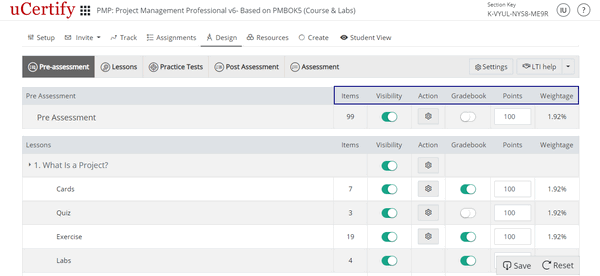
Figure 6.10: Design Tab with Options to Manage the Grade Items
LTI help and its use
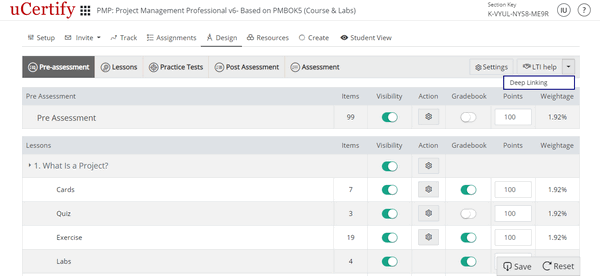
Figure 6.11: Drop-down Next to LTI Help Button
- Click the My LMS drop-down to select the desired LMS for creating the LTI link.
- Click the CRN drop-down to select the desired crn.
- Click the Module drop-down to select the desired module. If you want your LTI link to be secure, check if the Secure button is on.
- Different additional parameters related with the selected module will be visible. Select the desired options.
LTI link based on your selection will be created.

Figure 6.12: LTI Link Settings Wizard Page with LTI link.
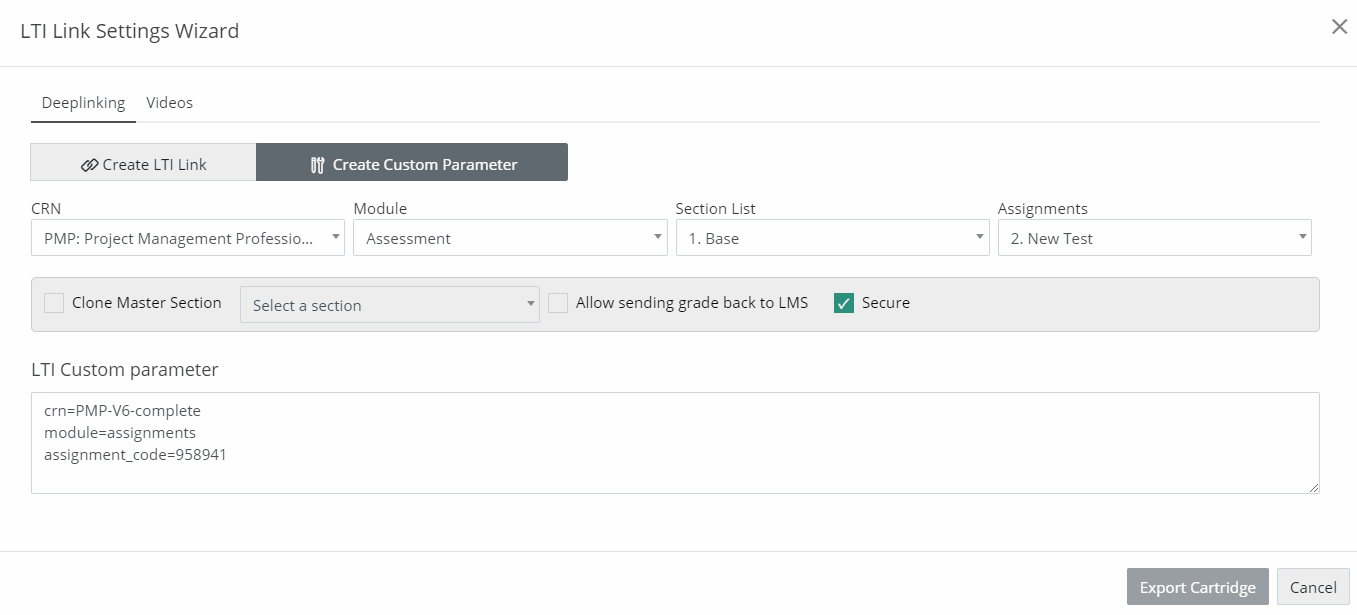
Figure 6.13: Create Custom Parameter Tab
Now, to view Videos related to the desired LMS integration, click the Videos tab.
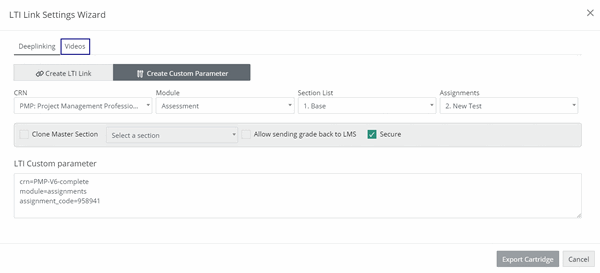
Figure 6.14: LTI Link Settings Wizard Page with Videos Tab
To view Guides related to the desired LMS integration, click the LTI help button on the Design page.
Lessons

Figure 6.15: Lesson Settings Modal Box
Settings of cards, quizzes, and exercises
To edit settings of the cards, quizzes, or exercises click the settings menu next to the desired cards, quizzes, or exercises.

Figure 6.16: Pre-Assessment Tab with Settings Menu of Cards, Quiz, and Exercise
Settings of the Cards are same as that of Lessons.

Figure 6.17: Card Settings Modal Box

Figure 6.18: Quiz Settings Modal Box
- Test Mode: It allows students to take exam in test environment where no explanation is available.
- Learn Mode: It allows students to check their answers immediately after each question by clicking the Learn button or the Next button on the bottom bar. This mode provides more practice and increases knowledge for the course.
- Review Mode: It allows students to review each question with its answer and explanation.
- Test and Learn mode available: It allows students to take exam in two modes, test and learn. The test mode is same as students take exam and no explanation is available. The learn mode allows each students to check their answers immediately after each question by clicking the Learn button or the Next button on the bottom bar.

Figure 6.19: Quiz Modal Box with Test mode Options
The settings of Exercise is same as that of Quiz.

Figure 6.20: Exercise Settings Modal Box

Figure 6.21: Practice Tests Settings Modal Box

Figure 6.22: Assessments Settings Modal Box
Grade Scale

Figure 6.23: Settings Modal Box with Grade Scale Tab
Gradebook Settings
You can hide the gradebook from the tab or can make gradebook visible to students. To do so, click the Gradebook Settings tab and click the On or Off button as per the requirement. Click the Save button to freeze your preferences.

Figure 6.24: Settings Modal Box with Gradebook Settings Tab
Sequence

Figure 6.25: Settings Modal Box with Sequence Tab