Student Manual
About
Getting Started
Login
- Email address and Password

Figure 1.1: Sign In/Sign Up modal box with the options to log in using Google or email address and password.
Welcome Page
- Home Page - Clicking on the Home Page button will take you to uCertify’s home page.
- My Library - Clicking on the My Library button will take you to your library section where you can find your purchased courses.
- Previous Page - Clicking on the Previous Page button will redirect you to the previous page.

Figure 1.2: uCertify Welcome Page
Managing Your Account
How to Add a License
- Click the My Library button.

Figure 2.1: My Library Button
- Click the Add License tab.

Figure 2.2: Add License Tab
- Type 16-digit Access Code, select the desired type to study the course and click the Validate button.

Figure 2.3: Add License Page
- If you have selected the Self Paced type, then after clicking the Validate button, the course enrollment page will be opened. Click the Enroll button to enroll in the course.

Figure 2.4: Course Enrollment Page in Self Paced Mode with Enroll Button
- If you have selected the Instructor Led type, then after clicking the Validate button, the course enrollment page will be opened. Type the provided section key in the section key box or select the I will add section key later option from the drop-down and click the Enroll button to enroll in the course.

Figure 2.5: Course Enrollment Page in Instructor Led Mode with Section Key Option and Enrollment Button
- To buy an access code online and get it delivered via email, type section key in the section key box and click the Get button.

Figure 2.6: Add Licence Page with Section Key Box and Get Button
- Click the Buy Now button under the course name and you will be redirected to the cart page.

Figure 2.7: Add Licence Page with Course Buy Now Button
- If you do not have the section key, select the I do not have section key option. Click the Buy Now button and you will be redirected to the Top Courses page.
Change Password
- Click on the My Profile tab.

Figure 2.8: My Profile Tab
- Click the Manage Password tab.

Figure 2.9: My Profile Page with User Details tab and highlighted Manage Password tab
- Type the desired password against respective columns and click the Save button to commit changes.

Figure 2.10: My Profile Page with Change Password Tab
Application Layout
Filter Tabs
- Active - All the active courses will be shown here.
- Archived - If you have archived any course, then it will be shown here.

Figure 3.1: Archive Option
- Expired - All the expired courses will be shown here.
- Ungrouped - All the courses, which does not belong to any group will be shown here.

Figure 3.2: My Library Page with Pre-Defined Tabs
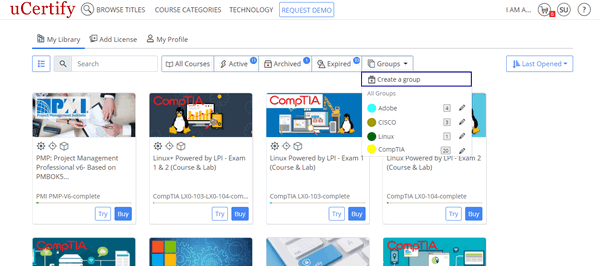
Figure 3.3: Groups button with the Create a group option
Type the name for the group of courses, which you want to create. Pick a color to identify your group and select the required courses for your group. Finally, click the Add button to create the group.

You can view the group name, color assigned to the group, and number of courses in the group, under the Groups drop-down.
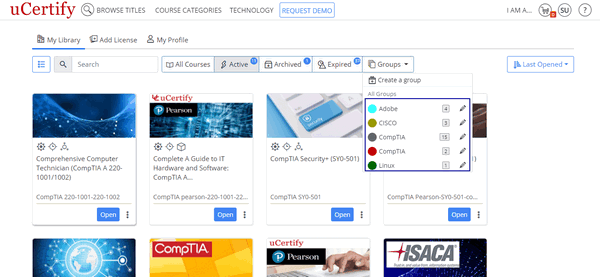
Figure 3.5: My Library Page with Course Group
To edit the details of the group or to delete the desired group, click the Groups drop-down and click the pencil icon next to the group name.
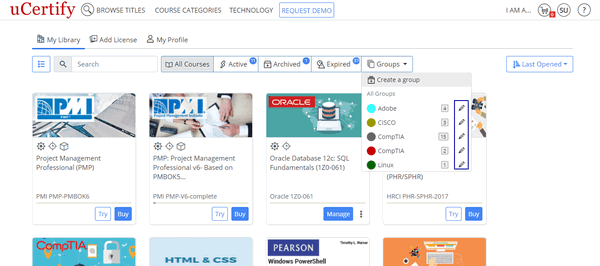
Figure 3.6: My Library Page with Edit Course Group Option

Figure 3.7: Edit Group Modal Box with Delete Course Option
Navigate to a Course
Search

Figure 4.1: My Library Page with Open Course Button

Figure 4.2: Course Dashboard
Keyboard Shortcuts

Figure 4.3: Keyboard Shortcuts Modal Box
| Shortcuts | Description |
|---|---|
| Alt+G | Course Navigation menu |
| Left/Right Arrow | Move within navigation menu |
| Up Arrow | Page Up |
| Down Arrow | Page Down |
Table 4.1: Keyboard Shortcuts
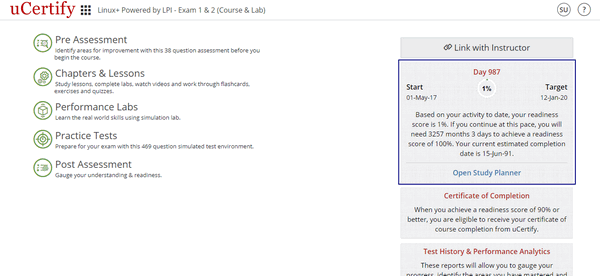
Link with Instructor
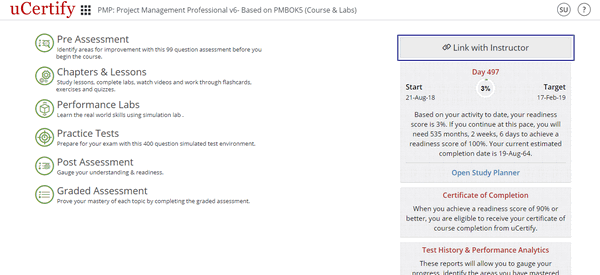
Figure 5.1: Course Dashboard with Link with Instructor Button
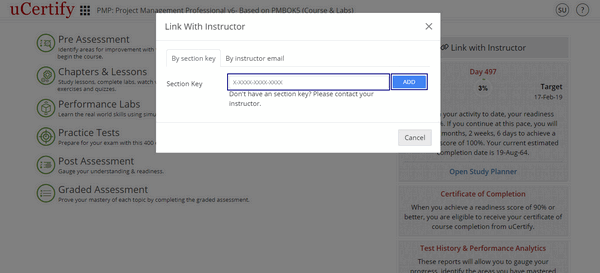
Figure 5.2: Course Dashboard with Link with your instructor by Section Key Option

Figure 5.3: Course Dashboard with Link with your instructor by Instructor's email Option
When your instructor will approve you as his/her student, you will be linked to your instructor.
Assessments
Pre-Assessment

Figure 6.1: Course Dashboard with Pre-Assessment Tab

Figure 6.2: Pre-Assessment Option through Course Navigation
The Pre-Assessment page will open.

Figure 6.3: Pre-Assessment Page with Start Button

Figure 6.4: Pre-Assessment Question
Practice Tests

Figure 6.5: Course Dashboard with Practice Tests Tab

Figure 6.6: Practice Test Main Page with Test Sets
Initially, all the test modes are disabled. Choose any test set to enable them.
For each assessment, there are three types of modes. Each mode tests your knowledge for the course in different ways. Here are the types of modes:
- Test: In this mode, you can take a timed test simulating the actual exam conditions.

Figure 6.7: Practice Test in Test Mode
- Learn: In this mode, you can check your answers immediately after each question by clicking the Learn button or the Next button on the bottom bar.

Figure 6.8: Practice Test in Learn Mode
- Review: In this mode, you can review each question with its answer and explanation.

Figure 6.9: Practice Test in Review Mode
Test Prep

Figure 6.10: Practice Test Main Page with Test Prep

Figure 6.11: Test Prep Question

Figure 6.12: Successful Attempt in Test Prep

Figure 6.13: Unsuccessful Attempt in Test Prep
After three consecutive correct attempts, the question will be removed from the set of questions in the pool. Clicking the arrow button at left side, will open the side panel which consists of following details:
- Mastered: Shows the number of items for the correct attempts.
- In Play: Shows the number of items for the incorrect attempts.
- Pending: Shows the number of items which are unattempted.
- Time: Shows the time lapse to attempt the items in the play pool.

Figure 6.14: Side Panel of Test Prep
Custom Test
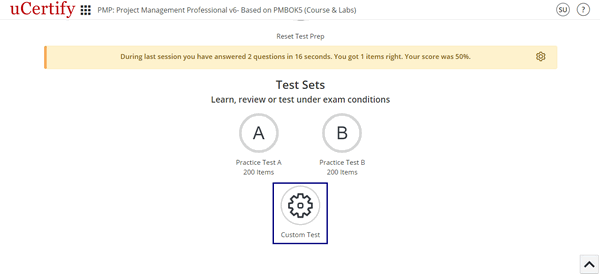
Figure 6.15: Custom Test Button
- Name for your custom test.
- Duration for the custom test.
- Settings for the custom test:
- Check the Randomize check box under the Items heading to randomize the items.
- Check the Randomize check box under the Answer Options (when applicable) heading to randomize the answer of each item selected for the assessment.
- To set the last option of an answer as None of the above, check the Last item as “None of the above” check box.
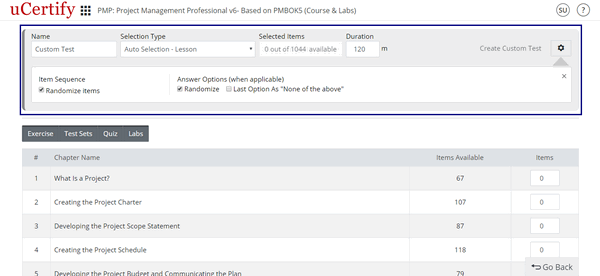
Figure 6.16: Create Custom Test Page
- Select mode & items for a custom test. There are two modes for selecting items for a custom test:
- Auto Selection: It allows you to choose items for your custom test with random questions from exercise, test sets, quiz, and labs.
- My Selection: It allows you to choose items for your custom test manually.
Post Assessment

Figure 6.25: Post Assessment Tab
The process of selecting test modes and other settings are same as that of Pre-Assessment.
Graded Assessment

Figure 6.26: Graded Assessment Tab
You will be redirected to the assessment page. All the assessments created by your instructor will be shown here along with the number of items, end date of the assessment, status of the assessment, total attempts made for the assessment, and action.

Click the Start button to begin the assessment.
Flashcards, Quizzes, and Exercises

Figure 6.28: Course Dashboard with Chapters & Lessons Tab
On the Table of Contents page, you will find that each chapter has its own Cards, Quizzes, and Exercises.
| Shortcuts | Description |
|---|---|
| R | To navigate to item list |
| P | To view previous item or activity |
| N | To view next item or activity |
| Ctrl+? | To open settings modal box |
| F | To flip flashcard |
| C | To mark answer as correct |
| I | To mark answer as incorrect |
Table 6.2: Cards, Quizzes, and Exercises Shortcuts
How to view progress made in Flashcards, Quizzes, Exercises, and Labs
Bottom bar while navigating through assessments
- Previous: Clicking the Previous button will take you to the previous question of the assessment. At first question, this button is disabled.
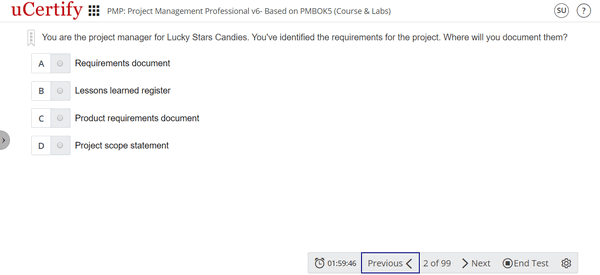
Figure 6.42: Previous Button in Bottom Navigation Bar of Assessment
- Next: Clicking the Next button will take you to the next question of the assessment.
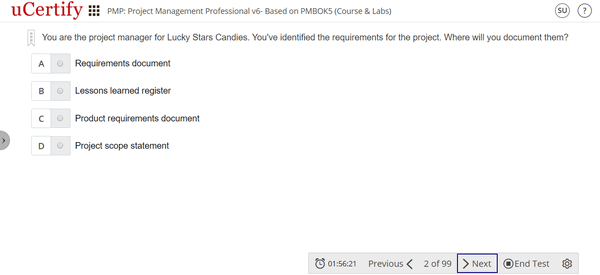
Figure 6.43: Next Button in Bottom Navigation Bar of Assessment
If you are on the last question of the assessment, then clicking the Next button will open a modal box showing that you are on the last question.
Clicking the End Test button will take you to the result page of the Exercise.
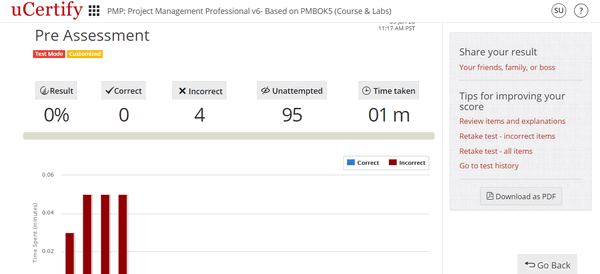
Figure 6.44: Result Page of the Exercise
The result page displays:
- Result percentage
- Number of correct questions
- Number of incorrect questions
- Number of unattempted questions
- Total time taken
- Graph which shows time spent on each question and whether it is correct or incorrect.
- Table with the correct answer, your answer, result, and bookmark information for each question.
- Clicking the Retake test – all items will allow you to again take test of all items of the assessment. Clicking the Retake test – incorrect items will allow you to take test of all incorrect answered items of the assessment.
- Clicking the Review items and explanations will allow you to review answers of all items with detailed explanations.
- Clicking the Go to test history will take you to the test history page. The Test History page displays a list of tests you have attempted with their scores.
- Settings: Includes four options Font & Color Settings, Enhanced Accessibility, Keyboard, and Full Screen.
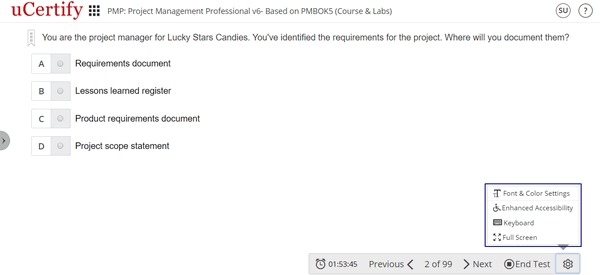
Figure 6.45: Settings Button Options in Bottom Bar of Assessments
- Selecting the Font & Color Settings option will open a pop-up box with font and color setting controls.
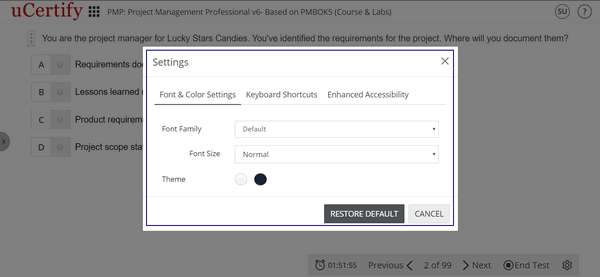
Figure 6.46: Font and Color Settings Modal Box
The Font family drop-down allows you to change the font used in the course.
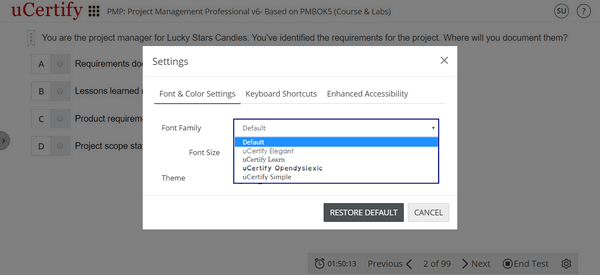
Figure 6.47: Font Family Options
The Font size drop-down allows you to change the font size of text showing in the course .

Figure 6.48: Font Size Options
There are three color modes: White, Sepia, and Black. White is used by default. You can change the color mode by selecting the appropriate buttons. Clicking the Restore Default button will reset all fonts and colors to default.
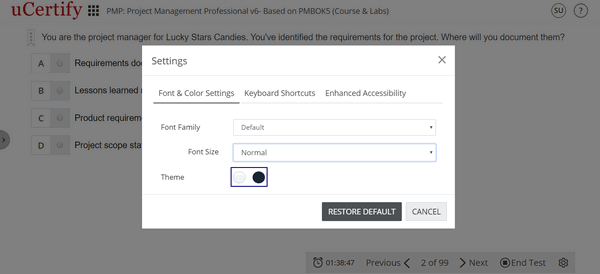
Figure 6.49: Theme Color Options
- Selecting the Keyboard option will open the Keyboard Shortcuts modal box.
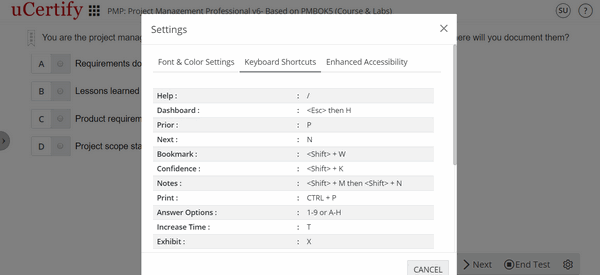
Figure 6.50: Keyboard Shortcuts Modal Box
- Selecting the Enhanced Accessibility option will open the Enhanced Accessibility modal box. You can set the Animation, Accessibility, and TTS Playback Speed option as per the requirement.
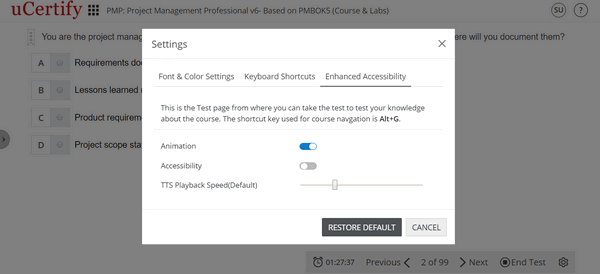
Figure 6.51: Enhanced Accessibility Modal Box
- Selecting the Full Screen option will enable to view the questions in full screen mode.
How to view Test History of Assessments, Quizzes, Exercises, and Practice Tests

Figure 6.69: Test History & Progress Reports Page

You can also search for a particular assessment, quiz, exercise, lab, or practice test via their mode and type. Click the Test Mode drop-down to select desired mode.
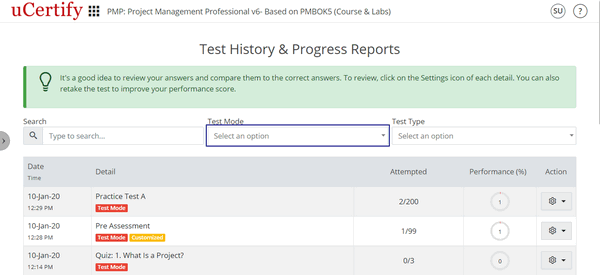
Figure 6.71: Test History & Progress Report Page with Test Mode Box
Now, click the Test Type drop-down and select the type of the test for which you wish to view the result.

Figure 6.72: Test History & Progress Report Page with Test Type Box
Chapters and Lessons

Figure 7.1: Course Dashboard with Chapters & Lessons Tab
Text-to-speech

Figure 7.2: Using Text-to-Speech Option in Chapters and Lessons
Maximum Time Spent
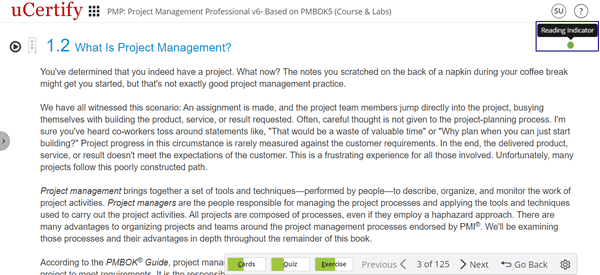
Figure 7.3: Chapters & Lessons with Reading Indicator
You can mark any topic as read or unread. Click the Reading Indicator next to the topic name and click the Mark as read or Mark as unread option.

- Table of contents: Consists of a list of chapters covered.
- Annotation: Consists of annotations marked in the chapters.
- Videos: Consists of videos used in the course.
- Glossary: Contains explanations of concepts relevant to the course, you can find the desired term using its initial alphabets or with the help of search box.
- Resource: Provides the option to download the course outline.
- Search: Allows to search about any topic throughout the course.
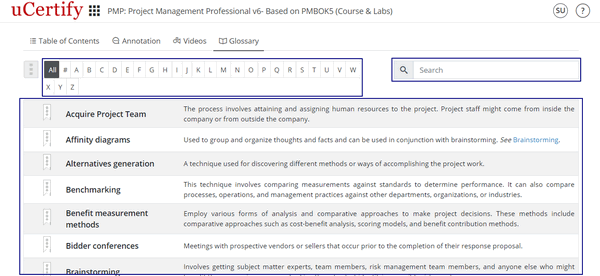
Figure 7.5: Glossary of Chapters & Lessons
Table of Contents
- Start where you left off: Takes you to the point where you left last time while going through chapters.
- Go to the farthest point read: Takes you to the farthest point that you ever reached.
- Enable bite-size learning: Changes the mode of e-book reading. Select this to enable and then open the desired content. In this mode, you can navigate through each chapter objective wise; by default, an e-book is navigated chapter wise.

Figure 7.6: Options Available in Table of Content
Features Available in E-book
Bookmark, Confidence, and Notes

Figure 8.1: Bookmark, Confidence, and Notes in Chapters
Annotations
Select the text you want to highlight and click the Annotate Adder icon from the pop-up box.
Figure 8.2: Annotate Icon
Select any of the color in which you want your text to be highlighted, add comments, links, media title, upload file, and add tags. Click the Save button.
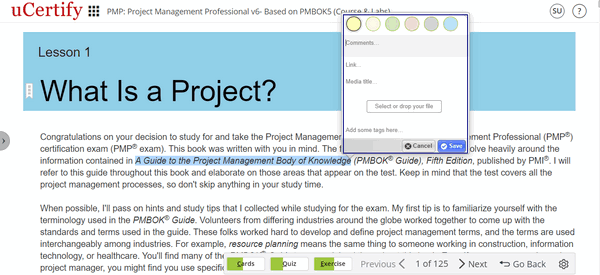
Figure 8.3: Annotation Options Modal Box
Figure 8.4: Comment on the Highlighted Text
Search from Wikipedia
Figure 8.5: Wikipedia Icon in Chapter
Clicking the Wikipedia icon will take you to a new window with links. Click the Open button of the required link. It will open the search results of the text on Wikipedia.

Figure 8.6: Wikipedia Links Page with Open Button
Search from Google

Figure 8.7: Google Search Icon in Chapter
Side Panel

Figure 8.8: Side Panel of Chapter
Once you open the side panel, you can see the following tabs:
- Table of Contents: By going nowhere, you can directly go to chapter or objective by clicking it.
- Annotations: All the bookmark, confidence, and annotated content heading are listed here. You can see all of these for all chapters here.
- Videos: It consists list of all videos in the course.
Bottom bar
- Cards
- Quiz
- Exercise
- Previous
- Next
- Settings
- Go Back

Figure 8.9: Bottom Bar of Chapter
When you are on a chapter, you can navigate through by scrolling or by using the Next and Previous buttons on the bottom bar.
Next Steps
1. Navigate to flashcards, quizzes, exercises, and labs.
2. Proceed to the next lesson.

Lab
- Simulation Lab
- LiveLab
- Sandbox
- 3D Avatar Based Simulation
Let us check out a simulation lab activity. Click the Performance Labs tab on the dashboard or select the Performance Labs option from the Course Navigation menu.
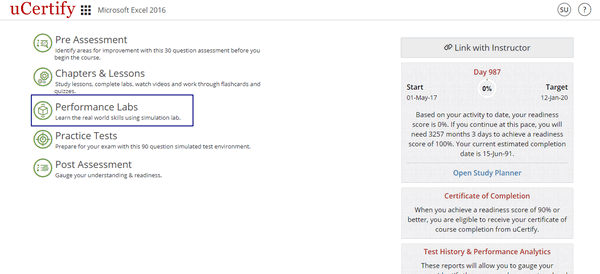
Figure 9.1: Course Dashboard with Performance Lab
| Shortcuts | Description |
|---|---|
| R | To navigate to item list |
| Alt+T | To reset the lab task |
| P | To view previous item or activity |
| N | To view next item or activity |
| D | To open device tab |
| X | To open exercise tab |
| V | To open evidence tab |
| A | To open answer tab |
| Up & Down arrow key | To select devices in lab task |
| Tab+Enter (After selecting device) | To move the devices in lab task |
| Alt+C | To close the lab task |
| Alt+H | To open help tab in lab task |
| Alt+M | To minimize/maximize lab task window |
| Alt+S | To restore lab task window |
| Alt+I | To print lab task activity |
| Alt+1 | To open lab task tab in review mode |
| Alt+2 | To open explanation tab in review mode |
| Alt+3 | To open answer tab in review mode |
| C | To mark answer as correct |
| I | To mark answer as incorrect |
| Alt+V | To open the video |
| Space Bar | To pause/play the video |
| M | To mute/unmute the video |
| Up Arrow | Increase the video volume |
| Down Arrow | To decrease the video volume |
| Right Arrow | To forward the video by five seconds |
| Left Arrow | To move the video back by five seconds |
Table 9.1: Performance Labs Shortcuts

Figure 9.2: Performance Labs Window with Options to Search Desired Lab
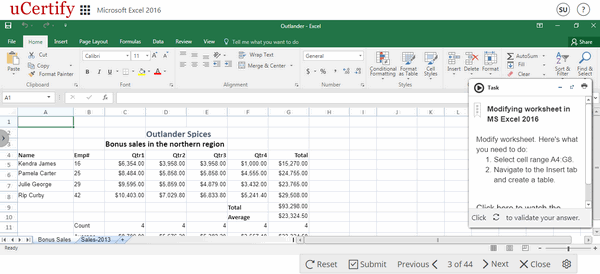
Figure 9.3: Lab Activity
Click on the expand-arrow button on the task information modal box to read the information about the task.
Figure 9.4: Lab Activity Question with Expand Arrow Button
Read the required steps mentioned under the task objective to perform the task, or you can watch a video tutorial clicking the Click here to watch the tutorial link.

Figure 9.5: Lab Activity Question Window
The video with its voiceover will be played in the left pane and its interactive transcript will be shown in the right pane.
Interactive Transcripts

Figure 9.6: Lab Video with Interactive Transcript
After watching the steps required to perform task, click the Go back button.

Figure 9.7: Lab Video Page with Go Back Button
Click the minimize button. Attempt the lab and click the Submit button to validate your task performed.

Figure 9.8: Submit Lab Task
The explanation lines will appear in red and green colors with the show-steps option. The green color refers to correct steps, red color refers to missed steps, and show-steps provide the process to attempt the task.

Figure 9.9: Explanation Tab With Correct and Incorrect Answers and Method to Perform the Lab
TERMINAL

Figure 9.10: Terminal Question with Speaker Icon
As soon as you enter any text or command in the terminal and hit the ENTER key, it will read your text or command. To disable the voice, click the speaker icon on the top right corner of the terminal.
Study Planner
Navigate to study planner
Your Study Planner page will open for that respective course.
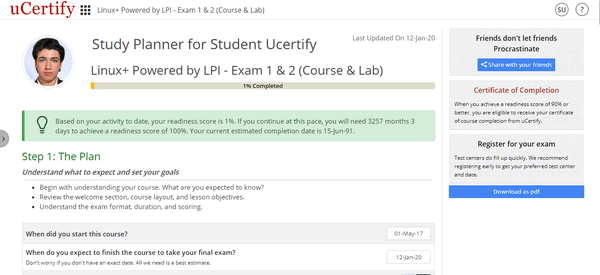
Figure 10.2: Study Planner Page
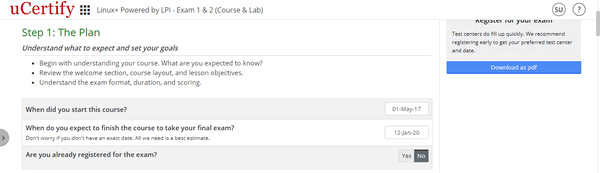
Figure 10.3: Step 1 of Study Planner

Figure 10.4: Step 2 of Study Planner
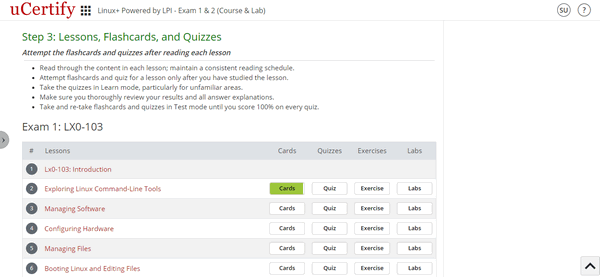
Figure 10.5: Step 3 of Study Planner
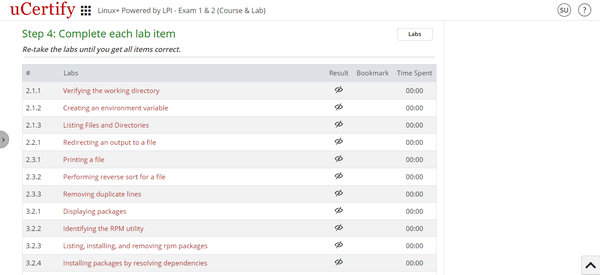
Figure 10.6: Step 4 of Study Planner


Figure 10.8: Step 6 of Study Planner
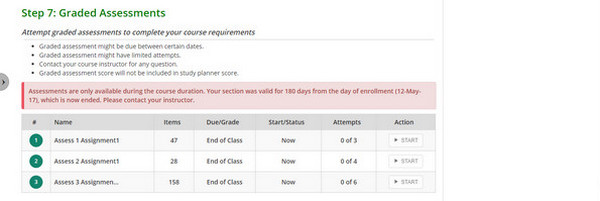
Figure 10.9: Step 7 of Study Planner
The progress bar on the top displays the percentage of course you have studied. If the bar is 100% Completed indicates that you have completely covered the course and are now ready for the exam.
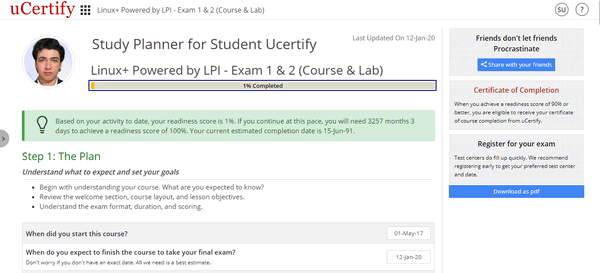
Figure 10.10: Study Planner Page with Progress Bar
If you click the Share with your friends button, a window appears by which you can share your planner with your friends on Facebook, Twitter, and Google+. You can also email your friends the URL of the study planner by just copying it from the text box.
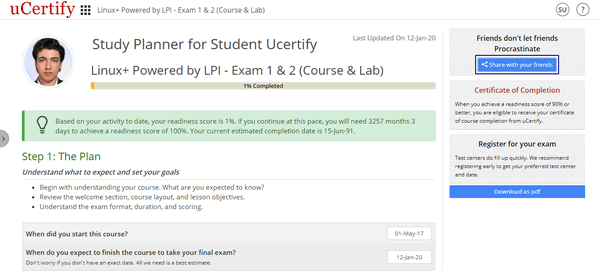
Figure 10.11: Share Study Planner with Friends Button
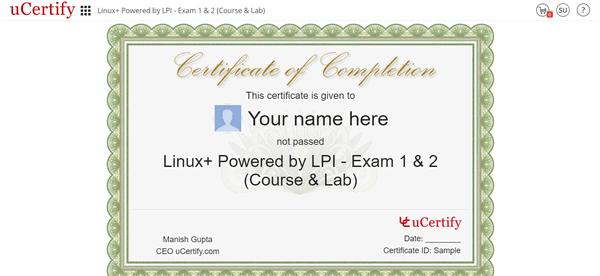
Figure 10.12: Certificate of Course Completion
Help Section

Figure 11.1: Question Mark Icon with Support Option
To view FAQs. how-to videos, and manuals related to the student area, you can visit the help section. On the Dashboard, click the question mark icon, and select the Help option.

Figure 11.2: Question Mark Icon with Help Option